Mounting options - watertight joint profiles
Covering change
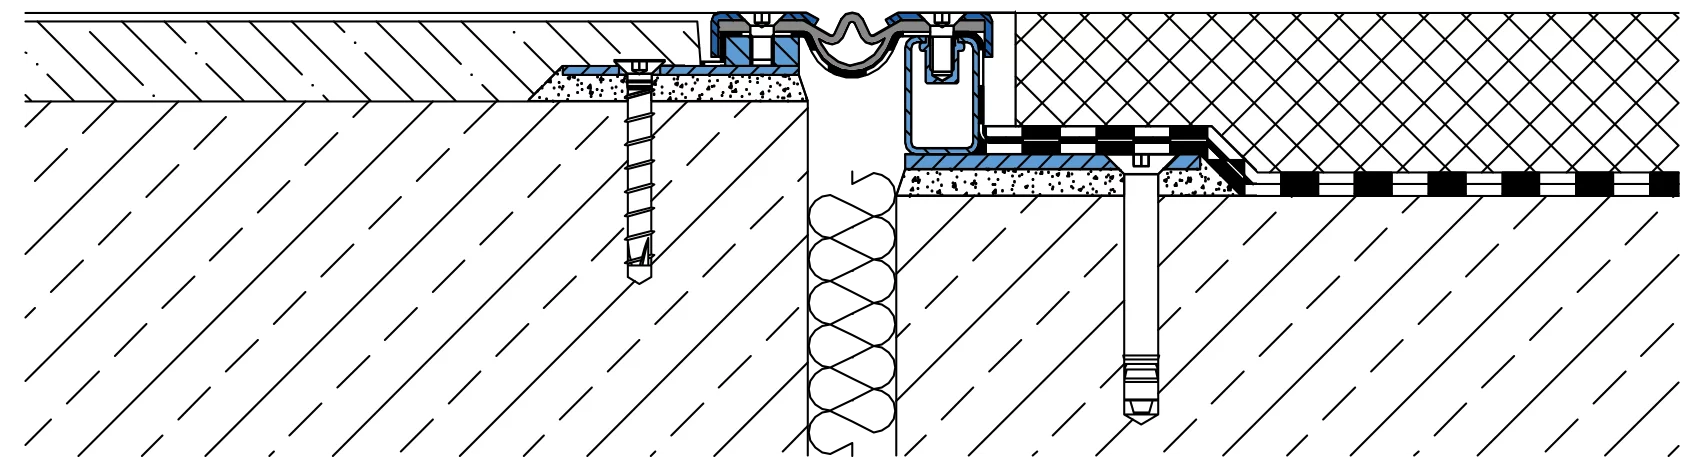
from coating to surface sealing with asphalt covering.
System example: VA.8.95/20 combined with VA.8.95/52 F
Covering change
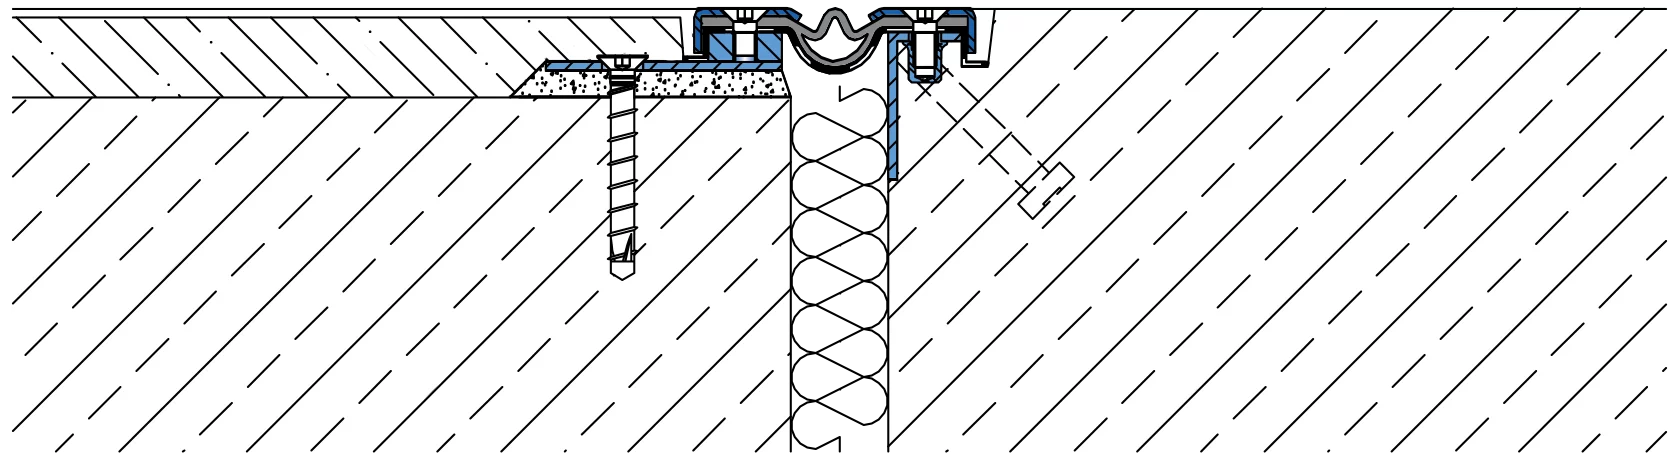
from coating to installation in in-situ concrete.
System example: VA.8.95/20 combined with VA.8.95/0
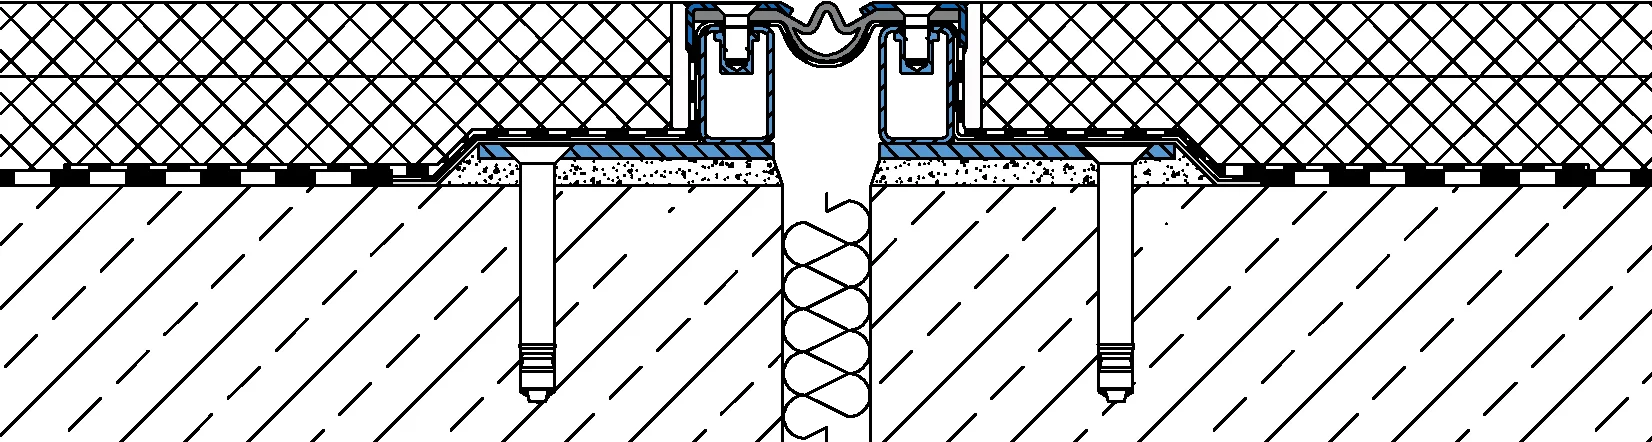
Covering change
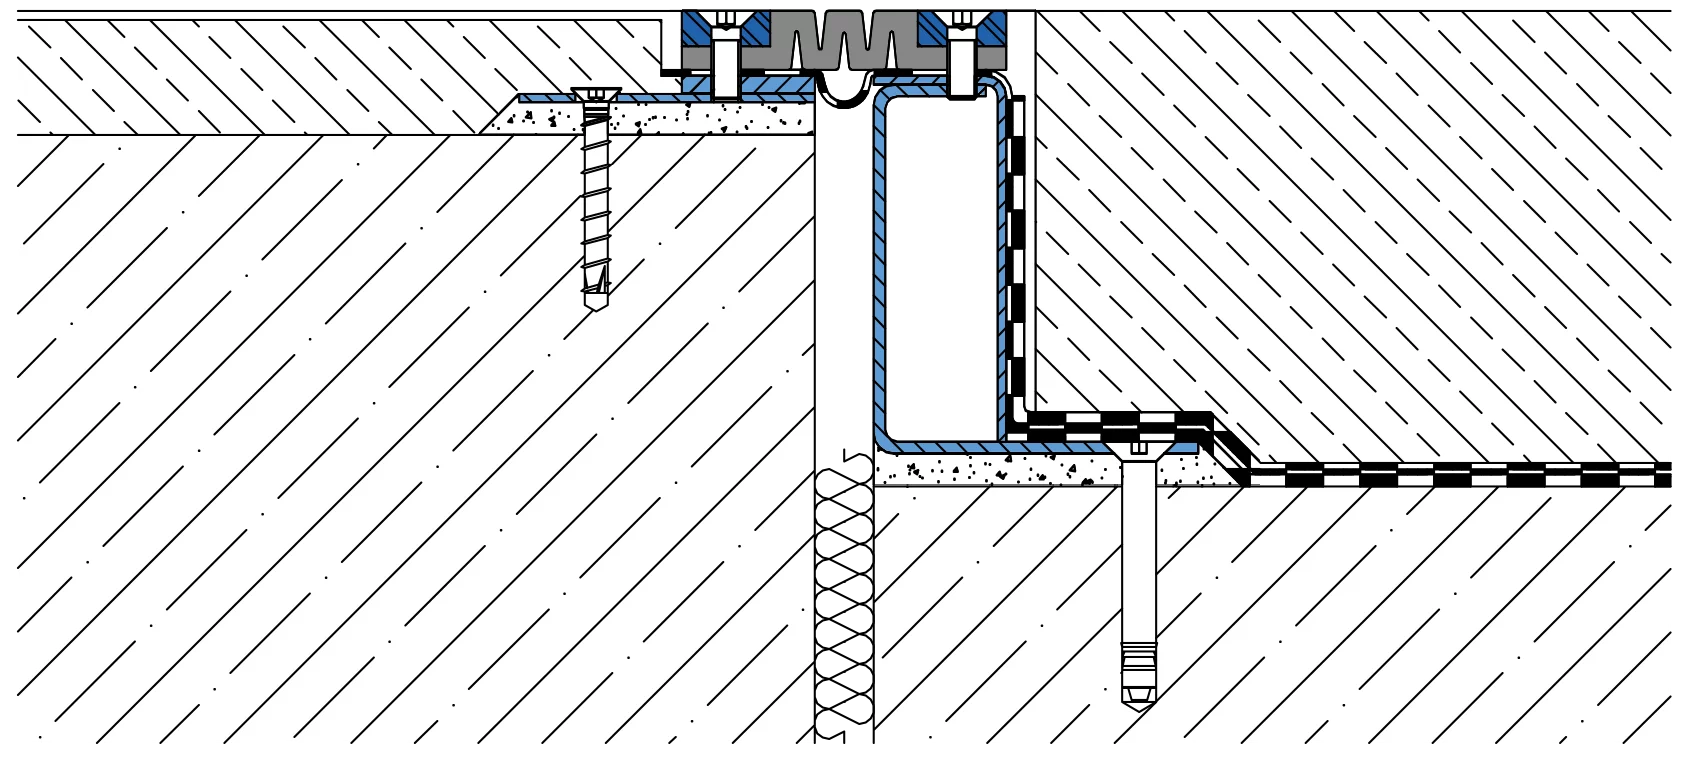
from coating to surface sealing with screed or concrete covering.
System example: VA.8.110/30 combined with VA.8.110/150 F
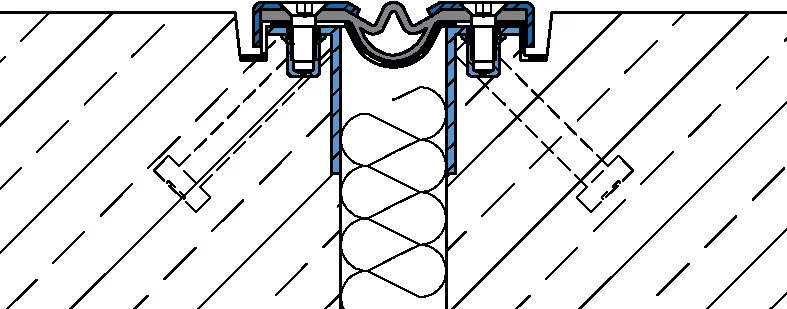
Coating

Mounted directly on the raw ceiling, suitable for renovations due to the low profile height of 21 mm.
System example: VA.8.95/20
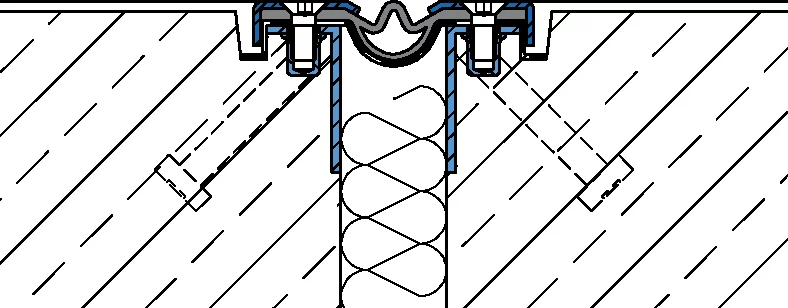
Liquid plastic
Mounted in recess, suitable for renovation without surface sealing.
System example: VA.8.95/22 F
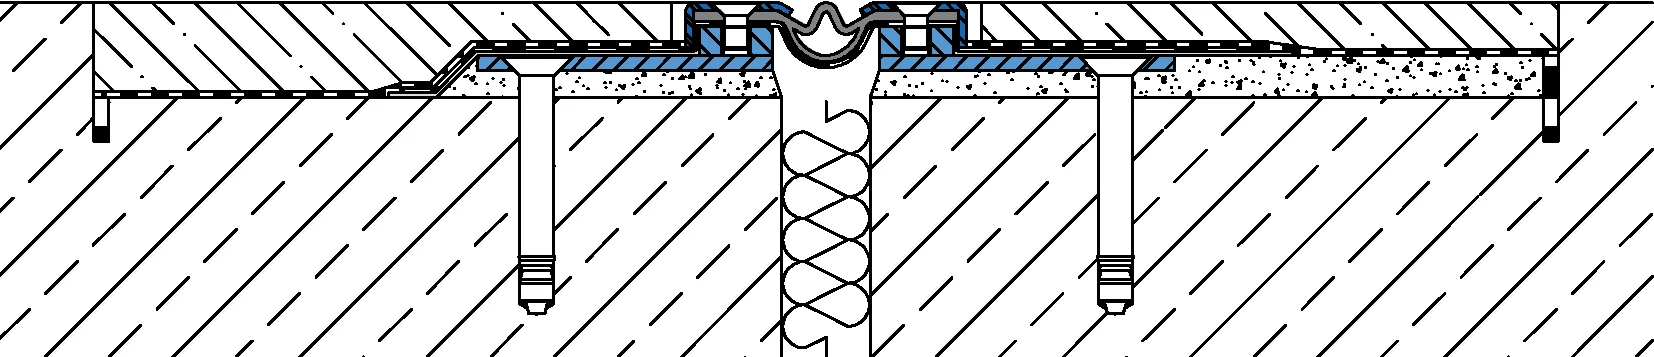
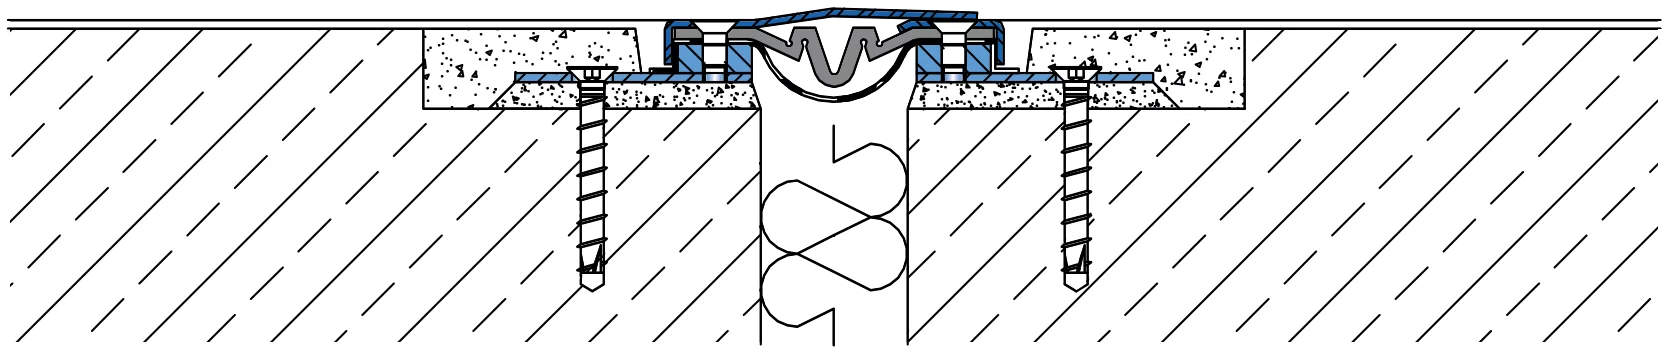
Liquid plastic
Mounted on bare slab, suitable for surface sealing with asphalt covering during renovation.
System example: VA.8.95/52 F
Dragging

of the fixing legs for bridging extremely wide structural joints.
System example: S-VA.8.115/37 F
Cover plate
Top cover plate, thus no more vertical movements (settling) possible.
System example: S-VA.8.115/20
Combination

uninsulated with insulated superstructures (e.g. ramp transition)
System example: BBF124/55 combined with BBF124/100 WD
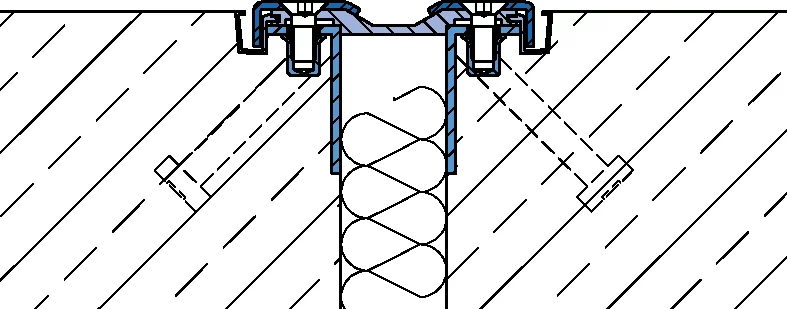
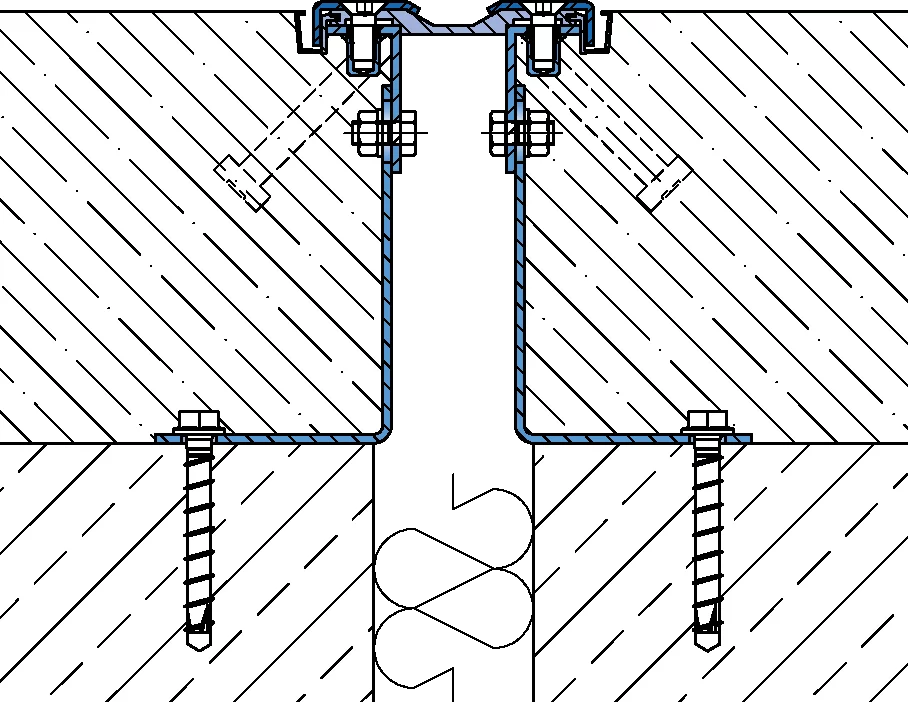
Installation on formwork
System example: VA.8.95/0 with grouting profile VP5/20
1. height adjustment of the first half of the joint profile by fixing it to the formwork.
2. After concreting, attach the second half of the profile using spacers. Subsequent concreting.
3. Before applying the coating, remove the spacer and the grouting profile VP5/20. Install the sealing membrane (Wolfin) as well as the expansion insert and press in place using stainless steel cover caps and countersunk screw M8 at 150 mm intervals.
4. Application of the coating:
For coating systems OS8, OS11 and OS13, the floating layer is applied flush with the surface in the open grouting joint. For coating system OS3, please request technical advice.
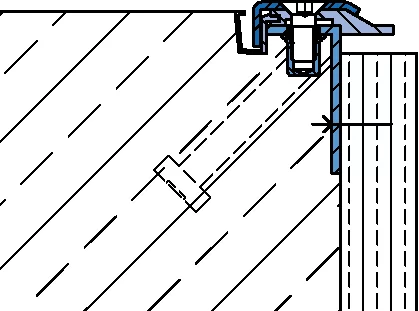
Installation on filigree plate
System example: VA.8.95/0 with grouting profile VP5/20
1. Dowel the prefabricated joint profile to the filigree slab using the adjustment angle. Subsequent concreting.
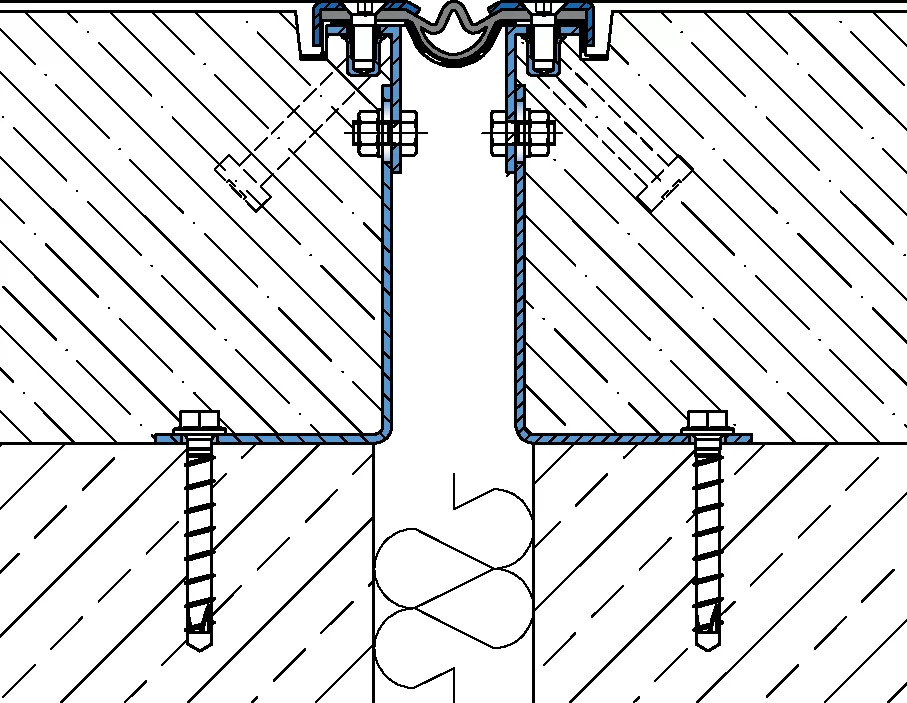
2. Remove the spacer and grouting profile VP5/20 and insert the sealing membrane and expansion insert. Finally, apply the coating to the joint profile.